
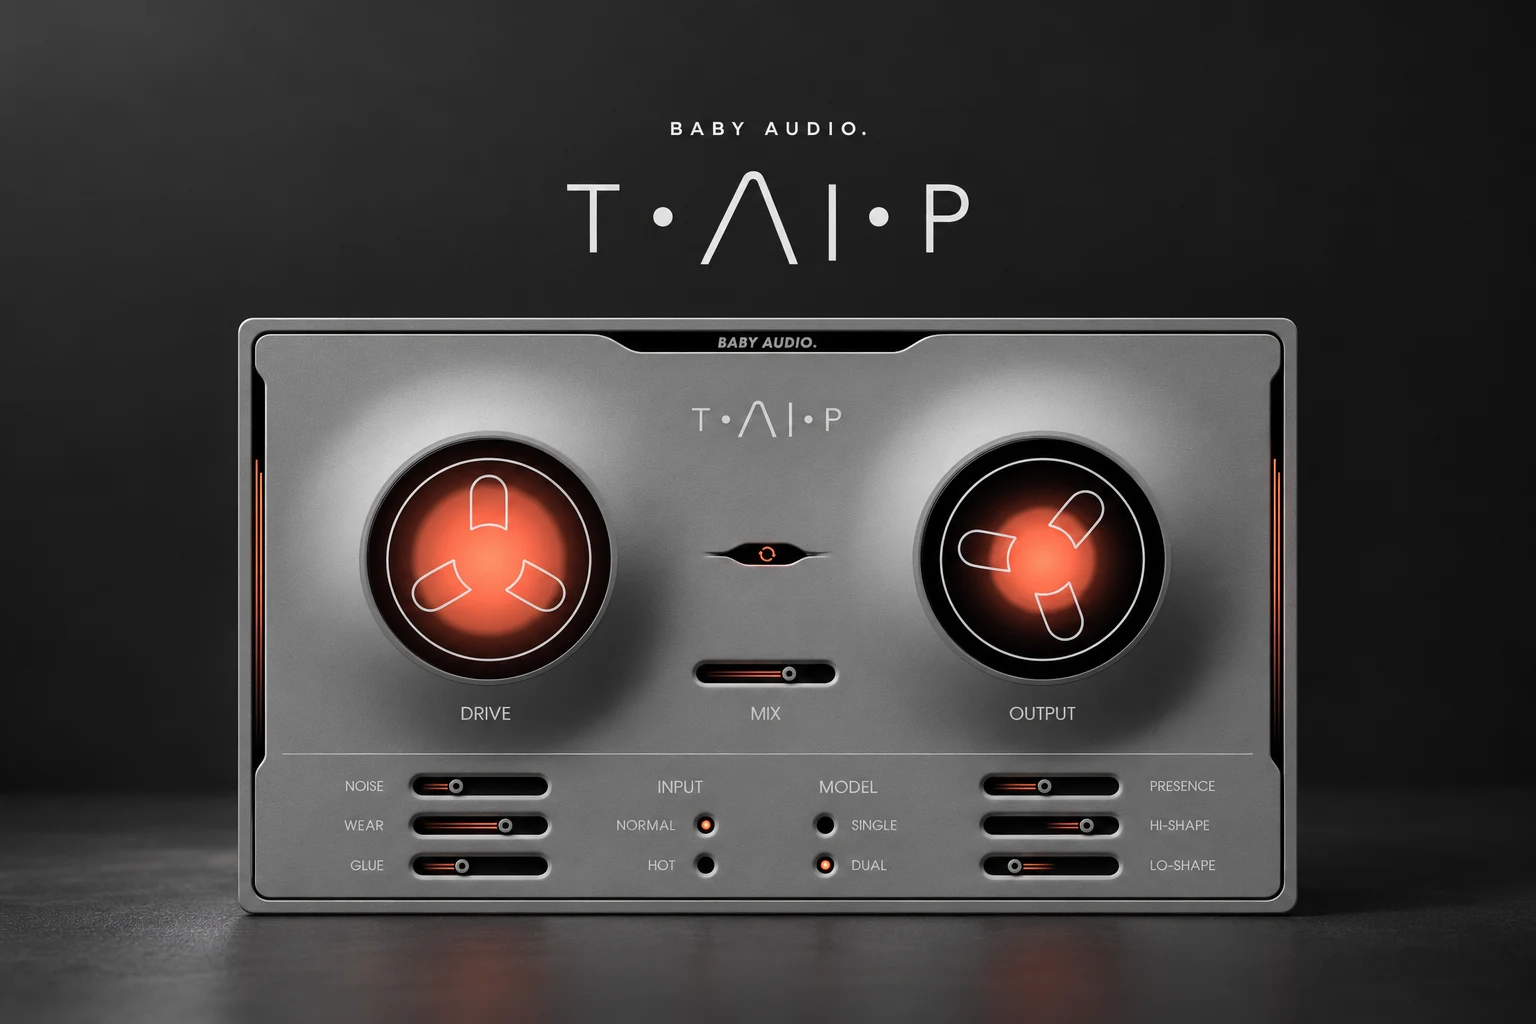

Baby Audio TAIP is worth considering if you want tape-style saturation with separate control over distortion, wear, noise and tonal behaviour. It is an interesting option for shaping a drum bus, giving a synth a less pristine texture or adding deliberate colour to a vocal.
The useful buying question is whether those controls help you reach the sound you want. A tape plugin does not improve every source simply by being active, and your existing saturation tools may already cover the job.
This review looks at the controls, practical auditioning ideas and the decision to buy. Our assessment is based on current product documentation, rather than a hands-on listening test.
What is Baby Audio TAIP?
TAIP is a tape saturation effect built using a machine-learning model. Baby Audio describes training on in-house material such as sine sweeps and white noise to model tape behaviour.
The AI label refers to the modelling approach. You still choose the processing and judge the result against the song. Our advice is to evaluate it like any other effect: with useful source material, a clear goal and a sensible comparison level.
Its appeal is the separation of tape-related characteristics. You might want saturation on a drum loop while keeping pitch movement restrained, or a worn texture on a background synth without adding audible hiss. Start with that intention before browsing presets.
Drive, Glue and Wear do different jobs
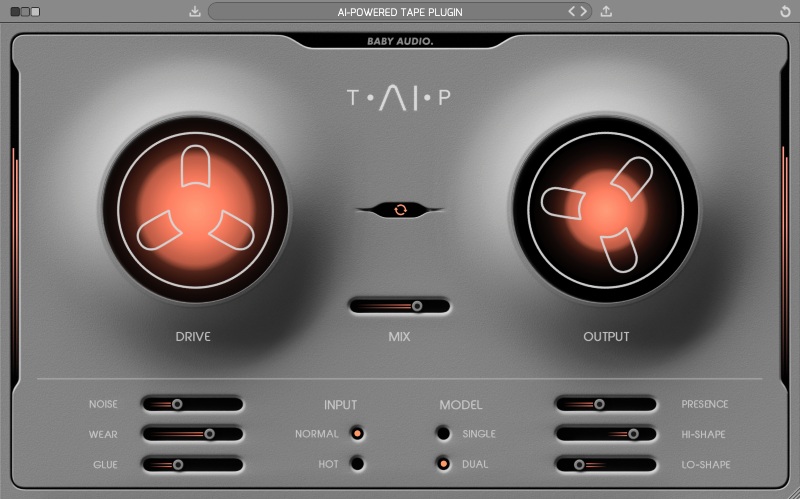
Drive adjusts the amount of saturation. Glue controls a compression-like aspect of the tape response. Wear combines pitch instability with changes in frequency response, while Noise adds tape noise.
Try those separately. Set Noise and Wear low for an initial saturation comparison, then explore Drive. Listen for whether attacks, sustained notes and quieter details still contribute what you want.
Next, introduce Glue and check the groove. A more controlled drum loop may be useful, but a less lively one may need a lighter setting. Watch the transition from quiet to loud hits, particularly if the original performance has intentional dynamic contrast.
Only add Wear when movement serves the part. A drifting electric-piano layer might suit an atmospheric verse. The same movement could make a tightly tuned bass feel uncertain. Compare it with the other instruments playing before committing.
Lo-Shape and Hi-Shape: why they matter
Lo-Shape and Hi-Shape change how strongly the low and high frequencies are saturated relative to the rest. Presence addresses the high-frequency attenuation associated with the tape sound.
For a drum bus, listen to the kick while adjusting Lo-Shape. You may want extra texture in the snare and percussion without changing the bottom end as much. Keep the bass instrument playing during this check, since its relationship with the kick is what matters.
For vocals, listen to consonants and bright phrases while comparing Hi-Shape settings. More edge can help a performance remain present, but it can also emphasise details you were already trying to control.
These controls give you reasons to audition TAIP beside a simpler saturator. They do not remove the need to solve an unwanted resonance or level problem directly. If the source already needs corrective work, keep that decision separate from the colour you add.
A drum-bus workflow to try in the demo
Choose a short section with a kick, snare and cymbal or percussion detail. Include some quieter hits so you can judge the behaviour across the loop.
1. Save a clean reference. Keep your original balance available and begin with restrained settings.
2. Explore Drive. Increase it until you can clearly hear the change, then reduce it to a useful amount.
3. Check the low end. Adjust Lo-Shape while listening to the kick and bass together.
4. Evaluate Glue. Decide whether the loop feels more connected or simply less punchy.
5. Add character selectively. Try Wear and Noise only if the arrangement benefits from them.
6. Compare at similar loudness. Revisit bypass with the full track playing.
TAIP includes Auto Gain to compensate output as Drive changes. Use it as an aid, then listen to the comparison yourself. A processing change can alter the balance of a loop even when the overall output seems similar.
If the clean attack is important, explore the Mix control. Keep checking whether the combined result improves the groove. More processed signal is not automatically more character in a useful sense.
For a modern hip-hop beat, try the treatment on a percussion group before including the main kick and 808. That gives you an easy comparison between a textured upper layer and a cleaner low-end foundation.
Vocals and synths need a different audition
Vocals: test the words, not just the sustained note
Pick a phrase that contains both a quiet ending and an assertive consonant. Set the effect against the instrumental and check whether the voice remains easy to understand.
Try a restrained version on the lead and a stronger one on an ad-lib or double. Different roles can justify different amounts of colour. Avoid deciding from one isolated vowel, since the surrounding words may reveal a much less useful result.
Also revisit your vocal level rides. Saturation can change how a phrase feels without making every word equally audible.
Synths: choose between stability and movement
Use a repeated chord or sustained note to audition Wear, then play the complete progression. Listen to the interaction with other pitched instruments.
For an ambient background, print a treated layer and arrange it underneath a cleaner lead. For a main bass, start with pitch movement restrained and ask whether saturation alone gives you what you need. Keep the musical role clear before adding more ageing effects.
Single, Dual and parallel processing
Single uses one tape-emulation stage. Dual places two stages in series, each applying half the Drive amount. The Mix control blends processed and dry signals.
Compare Single and Dual with the same source and a similar output level. Do not choose Dual solely because it sounds like the more complete setting. Keep the option that makes your part sit where it belongs.
Baby Audio also describes a tape-flanging effect from combining Mix and Wear. Treat that as a creative texture to audition deliberately. If you want a stable, nearly transparent treatment, that type of movement may be more than the part needs.
TAIP vs Decapitator, Decimort and broader retro effects
| Your goal | Where we would start |
|---|---|
| Tape-style saturation with controllable ageing | Audition TAIP's Drive, shape controls and Wear separately. |
| Explore another saturation workflow | Read our Decapitator review and compare the demo on the same source. |
| Shape digital sampling grit | Investigate Decimort 2's bit reduction and resampling approach. |
| Build a broader retro treatment | See our RC-20 vs SketchCassette II comparison. |
| Add occasional subtle colour | Try the saturation already included in your DAW first. |
Our Decapitator review, Decimort 2 review and RC-20 vs SketchCassette II comparison cover those separate buying decisions.
The strongest reason to add TAIP is a recurring preference for its particular controls and results in your sessions. Owning another tape-style processor makes a direct comparison especially useful.
Price, trial and compatibility
Plugin Boutique displayed €88.26 when checked on 18 October 2026. Check the current amount for your location because currency, tax and promotions may change the checkout price.
Baby Audio's downloads page lists TAIP v1.6. Its installers run in trial mode until activated. Test the current trial on a real session and check its restrictions before relying on it for an export.
The current manufacturer page lists 64-bit VST, VST3, AU and AAX formats, macOS 10.11 or newer with native Apple Silicon compatibility, and Windows 10 or newer. FL Studio is among the named supported hosts.
Use those current manufacturer requirements when checking compatibility. We have no measured CPU or latency results for this assessment, so test your normal track count, playback and project recall during the trial.
SoundShaper opinion
We would shortlist TAIP for producers who want to choose how much saturation, tonal change and ageing a source receives. The frequency-shaping controls are a concrete reason to compare it with the saturator you already use.
We would keep the trial focused on three examples: a drum bus, a vocal phrase and a sustained synth. Save a restrained setting for each and revisit it in context. Buy when those examples show a useful advantage in your own work.
Frequently asked questions
Does the AI choose settings for my mix?
The manufacturer's AI explanation concerns modelling tape behaviour. You still adjust the plugin and decide what suits your material.
Do I need to add hiss or pitch wobble?
Noise and Wear are separate controls. Evaluate them individually and keep only the characteristics your part needs.
Should I put TAIP on the master?
Only if the full mix benefits. Start with individual tracks or groups, then compare any mix-bus treatment across several sections at similar loudness.
Conclusion
TAIP deserves a demo if you regularly shape drums, vocals or synths with tape-style colour. Begin with saturation, protect the parts of the sound you want to keep and add ageing deliberately. Buy it when its controls help you reach a result you prefer.
Sources: Baby Audio product information, official downloads and version listing and the Plugin Boutique product listing. Details checked 18 October 2026.
![[background image] image of recording equipment (for a musician & band)](https://cdn.prod.website-files.com/68efa70811edd8e5af30a90d/6ad5413cb1504db30162273f_Phoscyon%202%20Review.webp)
![[background image] image of recording equipment (for a musician & band)](https://cdn.prod.website-files.com/68efa70811edd8e5af30a90d/6ad5403dd747f3fbbe4286ab_Chordjam%20Review.png)