
Gain staging means managing the signal level as audio moves through recording, plugins, buses and the final output. The useful goal is a chain that behaves predictably, with enough headroom and no unintended overload. You do not need to force every track to the same meter reading. Start by finding where the level becomes a problem, then adjust the gain before that point instead of only turning down the finished mix.
Which gain control should you adjust?
| Problem | Adjust here first | Why |
|---|---|---|
| The recorded input clips | Microphone preamp or interface input | A later DAW fader cannot undo distortion already captured |
| A plugin is driven harder than intended | Clip gain, input trim or gain before that plugin | Its processing depends on the signal arriving at its input |
| The plugin sounds right but makes the channel louder | Plugin output or a trim directly afterward | Keep the processing while controlling what feeds the next stage |
| The track is simply too loud in the arrangement | Track fader or automation | Change the mix balance without unnecessarily redesigning the insert chain |
| A bus overloads before its effects | Contributing sends or a trim before the bus effects | Reducing the final output may be too late to change their response |
Headroom is space for peaks, not a sound-quality preset
Headroom is the margin between the current signal level and a relevant limit. At a fixed-point digital output, 0 dBFS is the maximum sample level. During mixing, leaving a margin below that boundary makes it easier to add tracks, change EQ or automate a chorus without immediately hitting the ceiling.
A reasonable practical starting point is to keep the mix's sample peaks several decibels below full scale while you work. If a premaster peaks around −6 dBFS, that can be convenient, but it is not a compulsory target that makes the audio inherently better. Follow the delivery requirements when supplying a mix to someone else, and preserve the intended balance rather than chasing one arbitrary number.
Do not confuse headroom with playback volume. A quiet digital mix can still be monitored at a comfortable level using the monitoring controls. Raising the Master just to make your speakers louder may hide how little margin is left in the exported signal.
Peak, average and loudness meters answer different questions
A sample-peak meter shows the highest sample values. A true-peak meter estimates peaks in the reconstructed waveform, which can be higher than the sample peaks. Those are useful for checking output limits, but they do not tell you whether a vocal is sitting at the right musical level.
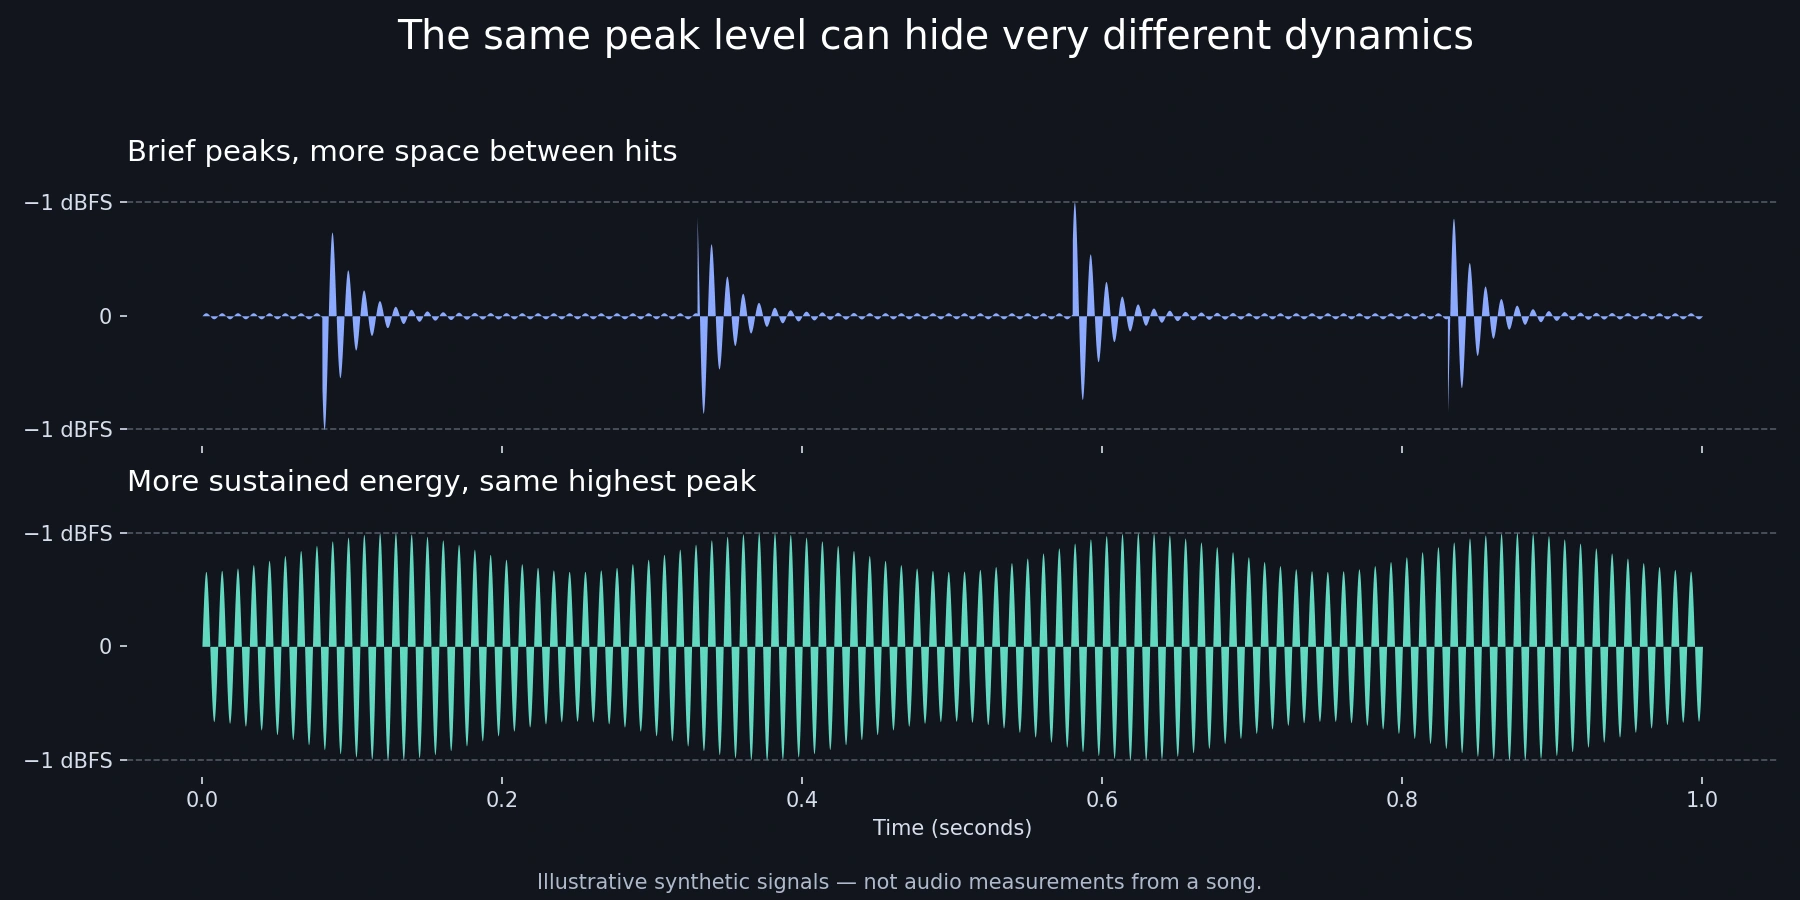
Average-level and loudness measurements look at the signal differently. RMS and VU-style displays give information about sustained level; LUFS adds a standardized loudness measurement with defined weighting and time windows. Their readings are not interchangeable. A short snare and a sustained pad can have similar peaks while feeling very different in loudness.
When someone recommends a target, ask which meter, which time window and which stage of the chain they mean. “Set everything to −18 dB” is incomplete advice without that information. Do not turn down transient peaks until they match a number intended as an average-level reference.
What the −18 dBFS recommendation actually means
Some analog-modeled processors use a nominal reference around −18 dBFS, often related to a 0 VU calibration. That is a useful operating reference for those particular designs, not a universal requirement of digital EQ, every compressor or every DAW channel. Other plugins use different calibrations or expose adjustable reference settings.
Consult the processor's manual and watch its input meter if it provides one. Then compare the sound at different input levels while compensating the output. You may want a tape or console model to saturate; in that case, the extra drive is an intentional sound choice. The problem is unintended drive that you mistake for an improvement simply because the output became louder.
A clean linear gain change in a floating-point mixer does not acquire a special tone at −18 dBFS. Level becomes sonically important when it changes the behavior of nonlinear or level-dependent processing, or reaches a boundary that cannot represent or pass the signal cleanly.
A calibrated VU meter for average-level checks
Waves VU Meter provides an adjustable reference for checking average level around a processor. If that processor’s manual specifies 0 VU at −18 dBFS, set the meter’s Headroom reference to 18 dB and compare sustained passages before and after processing. Keep a peak meter visible as well: a VU reading alone will not reveal every short peak. Buy a separate meter only if this display improves on the metering you already have.
A simple plugin-by-plugin check
Choose a loud, representative section rather than the quiet introduction. Save the project before changing an established chain. The aim is to identify unintended changes in level and behavior, not to make every plugin's input and output meters identical.
- Listen to the source before processing and check for distortion already present in the recording or instrument.
- Enable the first plugin. Decide whether it changes the sound in the way you intended.
- Use that plugin's output control, or a trim directly after it, to make the processed and bypassed versions similar in perceived loudness.
- Check the input of the next processor. If its reaction is now different, evaluate that reaction rather than blindly restoring the previous threshold.
- Continue through the chain, then check the bus and Master with all tracks playing.
Bypass comparison is a listening aid, not a requirement that every process preserve peak level. A compressor can reduce peaks while bringing up perceived density; matching only the tallest peak can make the compressed version misleadingly loud. Use your ears with appropriate metering and listen to more than one event.
Input gain and output gain are not substitutes
Consider a vocal feeding a compressor. Lowering the gain before the compressor can reduce how often the detector crosses its threshold. Lowering the gain after it makes the processed result quieter but leaves the compressor's earlier response unchanged. Both controls reduce volume, yet they do different jobs.
The same distinction applies to distortion and saturation. If you like the added harmonics, keep the drive and reduce the output. If you do not like the distortion, reduce the input or drive first. A post-plugin trim cannot restore the original waveform after a processor has intentionally clipped it.
Our EQ before or after compression guide explores a related decision: changing the incoming frequency balance can alter what triggers compression even when the overall level seems similar.
Gain staging in FL Studio
In FL Studio's ordinary Mixer insert path, the effect slots come before the track's integrated level and panning controls. That means pulling down the Mixer fader does not lower the level entering the plugins earlier on that same insert. It does lower the track's contribution to downstream routing, including the usual post-fader sends.
If an insert plugin is receiving too much level, adjust the source output or place a gain utility before that plugin. If the plugin sounds right and you only need to rebalance the track, use the Mixer fader. Verify the actual route if you use Patcher, custom sends or multiple buses; a control's job depends on where it sits.
Watch the Master with the full arrangement playing. A sensible level on each individual track does not guarantee a sensible sum. Several correlated sounds or layered drums can produce a larger combined peak than you expected.
Does floating-point audio mean clipping no longer matters?
Modern floating-point DAW engines can represent internal signal values above 0 dBFS. In an otherwise clean floating-point path, reducing such a signal before a constrained output can preserve it without the hard clipping associated with fixed-point limits. That is why an internal over-zero reading does not always mean the waveform has already been irreversibly damaged.
It is not permission to ignore every red meter. A plugin may deliberately saturate or limit, an external hardware path has its own limits, and a microphone preamp or converter can overload before the DAW receives the recording. Turning down a floating-point file cannot repair distortion introduced earlier by those stages.
A 32-bit float export can retain over-zero values for later adjustment in compatible software. It should still be checked before playback or delivery, and it does not recover a clipped microphone recording. For the separate export-format decision, see our FL Studio export settings guide.
Recording levels: leave room for the louder take
Set input gain while the performer plays or sings the loudest expected passage. Leave enough margin for a stronger take and check that neither the input stage nor the converter clips. On a normal 24-bit recording path, you do not need to record just below full scale to capture a useful signal.
Also listen for excessive room noise or a poor source-to-microphone balance. Raising a quiet recording later raises its noise too, but turning up the preamp cannot solve an unsuitable microphone position or a noisy room. Gain staging and recording technique support each other; neither replaces the other.
What to do when the whole mix is too hot
If the unwanted overload occurs only at the final output, reducing the level before that output can be enough. If a bus compressor, saturator or limiter is already reacting too strongly, reduce the level before that processor and reassess its settings. Turning down a fader after it only makes the overprocessed result quieter.
Avoid selecting every track and lowering everything indiscriminately when the session has nested buses and sends. You may reduce both a source and the bus it feeds, changing the intended balance or effect relationship twice. Identify the common point that needs adjustment and verify a chorus, transition and quieter section afterward.
Once the levels behave predictably, make loudness decisions deliberately. If the exported track still seems quiet, use our quiet export troubleshooting guide to distinguish peak level, loudness and playback normalization instead of driving every channel harder.
Conclusion
Good gain staging means each stage receives a sensible level for the behavior you want, and the final output stays within its required limits. Adjust gain before the stage that is causing the problem, compensate output when evaluating processing and keep enough working headroom. Use meter readings to diagnose the chain, not as numbers every track must match.
Technical references: Image-Line levels and clipping, Mixer signal flow and Waves VU Meter calibration manual. Checked November 17, 2026.


