

Choose Scaler 3 if you spend most of your writing time finding better chords, working out the harmony of an idea you already recorded, or trying bass and arp variations in one arrangement. Choose Captain Plugins 8 if your workflow starts inside a DAW and you want separate tools to sketch chords, a lead, bass and drums. The difference becomes obvious when you revise the hook after you’ve written the other parts.
Here’s a four-bar exercise you can repeat in either tool. You’ll change two chords, keep one melody fixed and see how much of the bass part you have to revisit before the MIDI is ready to arrange.
Scaler 3 vs Captain Plugins 8: Comparison Table
| Decision | Scaler 3 | Captain Plugins 8 |
|---|---|---|
| Start from an existing idea | Use Detect to explore notes or chords in MIDI or audio. | Start with Captain Chords or bring MIDI into the canvas. |
| Build the accompaniment | Add Motion tracks alongside the Main Track in Arrange. | Connect Captain Deep and Captain Melody to Captain Chords inside your DAW. |
| Edit one part | Work across lanes in one Scaler window. | Open the module for the part you’re editing and check its link to Captain Chords. |
| Sketch drums | Build rhythmic pitched parts with Motions, then arrange your drums in the DAW. | Captain Beat is included as a dedicated drum-pattern tool. |
| Move the parts to your instruments | Multi Track MIDI export writes separate files. | Drag MIDI from the relevant module to the receiving track. |
| Where it runs | Desktop plugin or standalone app. | Connected plugins inside a supported DAW. |
One writing exercise for both tools
Set your DAW to 96 BPM in 4/4. Put one sustained chord in each bar, then add a simple bass patch and a short lead sound. For the first pass, use roots in the bass and play one long melody note per bar. Keep the same instrument patches for the final A/B in your DAW. That keeps differences in preset volume, articulation and octave from deciding the comparison for you.
| Bar | Verse chord | Hook chord | Fixed lead note | Hook bass root |
|---|---|---|---|---|
| 1 | Cmaj7 | Cmaj7 | E | C |
| 2 | Am7 | A7 | E | A |
| 3 | Dm7 | Dm7 | F | D |
| 4 | G7 | Fmaj7 | G | F |
Bar 2 checks note choice. A7 introduces C♯ while the root and your E melody note stay fixed. If a generated part hangs on C natural here, audition it against C♯ in the chord. A short passing note might work. A held C can make the clash much more obvious. Listen to the movement from C♯ into Dm7 on the next bar.
Bar 4 checks bass tracking. The root moves from G to F. The lead can keep G as an added ninth against Fmaj7. If the new bass still holds G throughout the bar, check that it is following the revised chords and that you’re playing the hook version. Then listen to whether the softer Fmaj7 ending suits the return to Cmaj7 better than the stronger G7 resolution.
Build the hook in Scaler 3
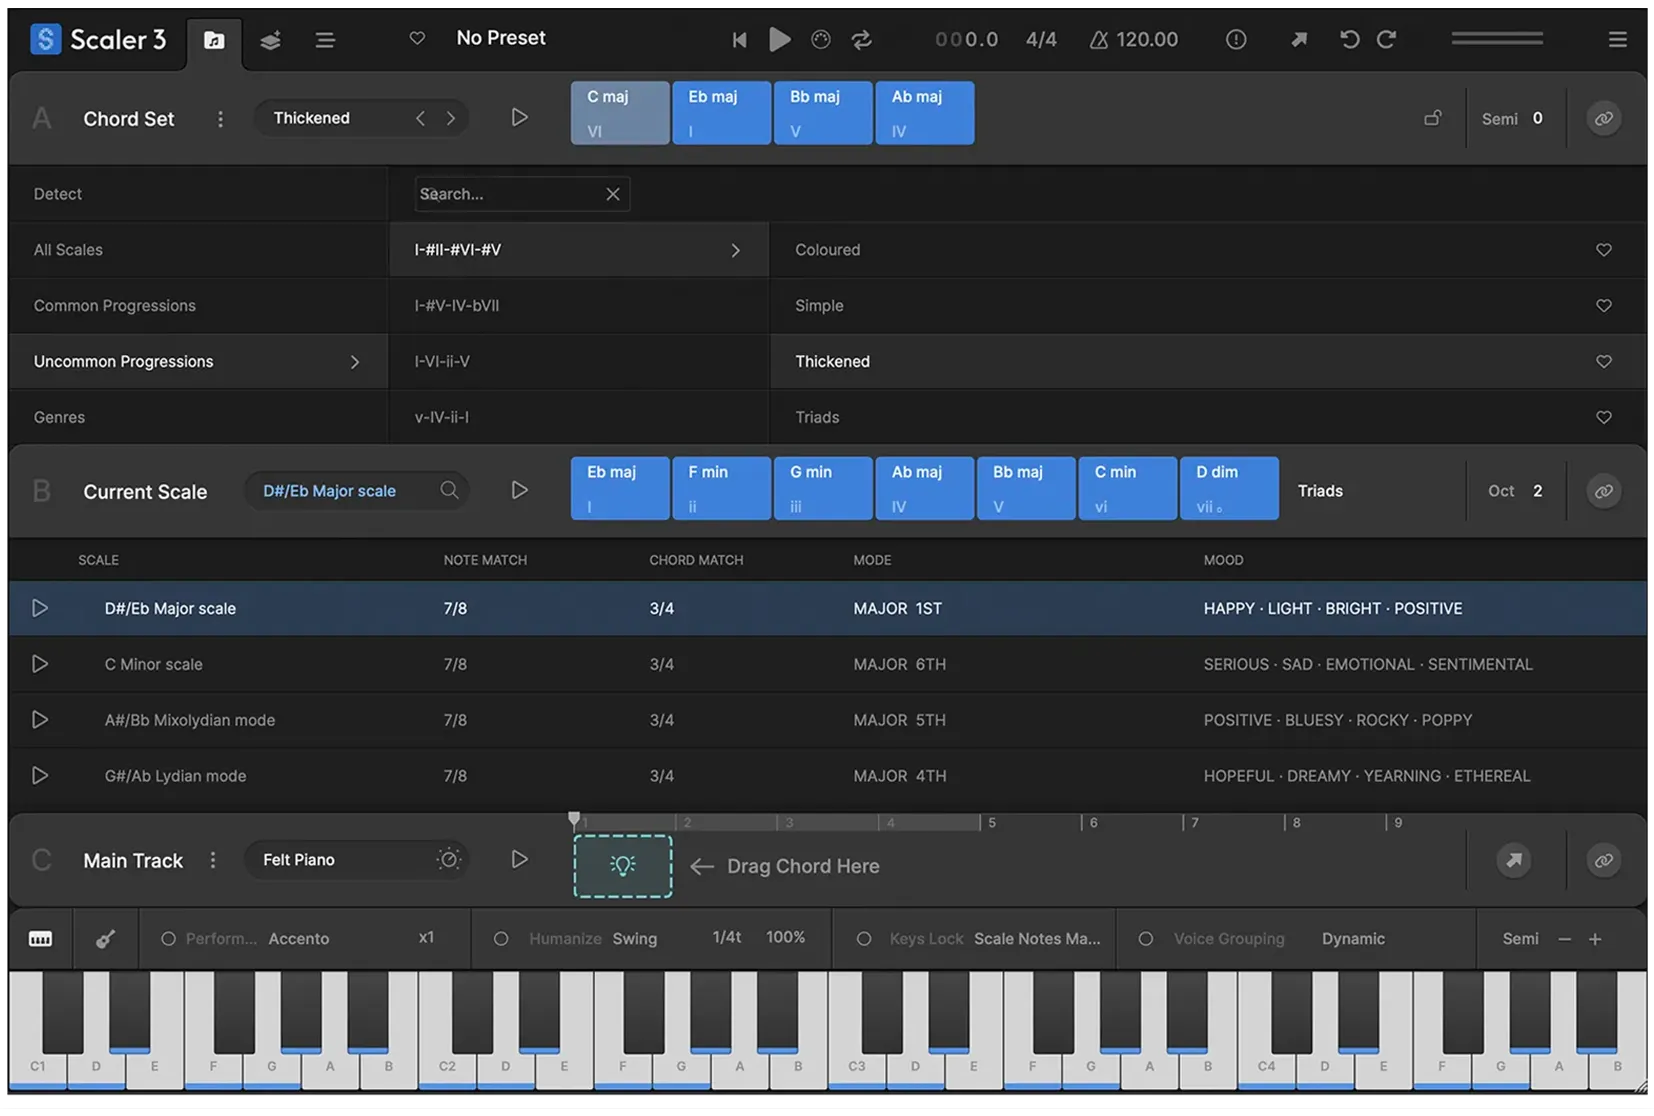
1. Open Browse, choose C major and build the verse on the Main Track. Use the chord tools in Create when you need a chord outside the starting scale, such as A7. Audition it next to Dm7 before building the bass.
2. Switch to Arrange. Save a verse version before making the hook changes. In the hook, change bar 2 to A7 and bar 4 to Fmaj7. Zoom out enough to see the entire four-bar phrase so you can spot timing gaps.
3. Add a bass Motion using the + control in Arrange. Start with a sparse pattern. Solo the bass with the Main Track and check whether the bass changes to F in bar 4. Bring back the fixed lead on a separate track in your DAW once the bass checks out.
4. Open Export → MIDI Export and choose Multi Track. Export the loop if it covers exactly your four bars, or export the arrangement if you’ve placed both versions in sequence. Import the resulting parts onto separate tracks and line them up to the same bar.
Try an arp after the bass works
Add an arp or phrase Motion on another lane and listen to bar 2 with the fixed E. This is where Scaler’s single-window layout helps. You can hear the chord, bass and extra part, then change the Motion or mute the lane while leaving the chord in place. If the extra lane muddies the hook, try a higher register or fewer notes before changing the progression again.
If you’re starting from a piano sketch instead of this written exercise, try Detect on the sketch first. Compare its suggestions with the notes you intended and use the Main Track to try alternatives. Detection gives you somewhere to start editing, especially when a recording has passing notes or a voicing that could fit more than one chord name.
Build the hook in Captain Plugins 8

1. Load Captain Chords as an instrument in your DAW. Set the key and scale in the upper-left area. Use the add-chord control to create the verse, then use Custom when you need A7. Select the relevant chord on the canvas and check its length after changing it.
2. Load Captain Deep on another instrument channel and connect it to Captain Chords. Start with a simple rhythm and a bass shape that follows the chords. Check the connected workspace and listen to bar 4 by itself. If you still hear G after the swap, confirm the selected workspace and whether an earlier MIDI clip is also playing.
3. Keep the four fixed melody notes on a regular DAW track for the comparison. If you want the suite to suggest a new lead afterward, load Captain Melody, connect it to Captain Chords and audition it against the hook separately.
4. Drag the MIDI for each finished part from its module to the corresponding instrument track in your DAW. If your host handles drag-and-drop differently, export or drop the clip to a file location first where supported, then import it into the receiving track. Turn off playback from the generator while auditioning its exported clip.

Use the DAW as the final arrangement
The connected modules make sense if the rest of your session already lives in the DAW. Use Deep to sketch a bass rhythm and Beat to sketch drums if you need them. Then keep the MIDI takes you like on your instrument tracks. When you change the harmony later, export the changed parts again or keep composing from the live plugin instances. A clip already dropped onto an instrument track is a snapshot of the part at export.
Which one should you buy?
Buy Scaler 3 if you spend longer choosing the chords
Scaler is the stronger fit for a producer who starts from a recording, a MIDI sketch or a chord that feels almost right. Browse, Detect and Arrange let you carry an idea from harmonic exploration to multiple MIDI parts in one place. For this exercise, the decision is whether you find yourself revising the chords and auditioning several layers together. If that’s your normal session, Scaler’s arrangement earns the extra space in your workflow.
Buy Captain Plugins 8 if you want to sketch each part inside the DAW
Captain is a better fit when the chords are only the first step and you want dedicated controls for the bass, melody and drum patterns. Deep is particularly relevant if you spend more time finding a bass rhythm than selecting a chord voicing. If you frequently export one finished part, turn its source plugin off and move on to the next instrument, Captain’s separate modules fit that workflow.
Compare the full licenses
Plugin Boutique listed the full Scaler 3 license at $69 through December 7, 2026, with a $99 regular price, when checked on November 9. Check the Mixed In Key store for the current Captain Plugins 8 bundle price. If you already own either product, compare the upgrade offer in your account with the full license before you buy.
For a closer look at Scaler’s workflow, read the Scaler 3 review. If you mainly produce in FL Studio, try the same chord task with the built-in tool first using the Scaler 3 vs FL Studio comparison.
Frequently asked questions
Do I need both Scaler 3 and Captain Plugins 8?
Most producers can start with one. Both can help you sketch chords and related MIDI parts. Pick based on whether you want to explore harmony and arrange layers in one interface or build the parts in connected modules inside your DAW.
Can I keep using my own instruments?
Yes. Export the MIDI and place it on the DAW track for your synth, bass or keys. Check transposition, note range and velocity on that instrument, especially when swapping a built-in bass preset for a patch that responds differently.
Can I use the Captain suite in FL Studio?
Mixed In Key lists FL Studio as a supported host. Scan the installed plugins in FL Studio, open Chords and Deep as separate instruments, and confirm they’re linked before judging the bass response. For a simple progression you plan to edit entirely in the Piano Roll, the native FL workflow is worth trying first.
Workflow references include the Scaler 3 user guide, Scaler 3 release notes, Captain Chords guide, Captain Deep product guide and Captain Plugins 8 release notes.


